Help & User Guide
The TeamInvest Processor is a web application that retrieves payment transactions from FatZebra and Xero, and submits them to the TeamInvest Spring Boot API for processing into the TIMMS system.
All operations are manual — a user selects a date range, fetches transactions, reviews them, and submits with a passcode. The system records every run for audit purposes.
Key concepts
- Fetch — retrieves live transactions from the gateway for a selected date range. Nothing is saved at this point.
- Process — submits the fetched (or selected) transactions to the TeamInvest API and records the result in the database.
- Processed / Pending — after fetching, rows already in the database are highlighted as ✓ Done. New rows show as Pending.
- Idempotency — the system prevents duplicate submissions at both the local database and the TeamInvest API level.
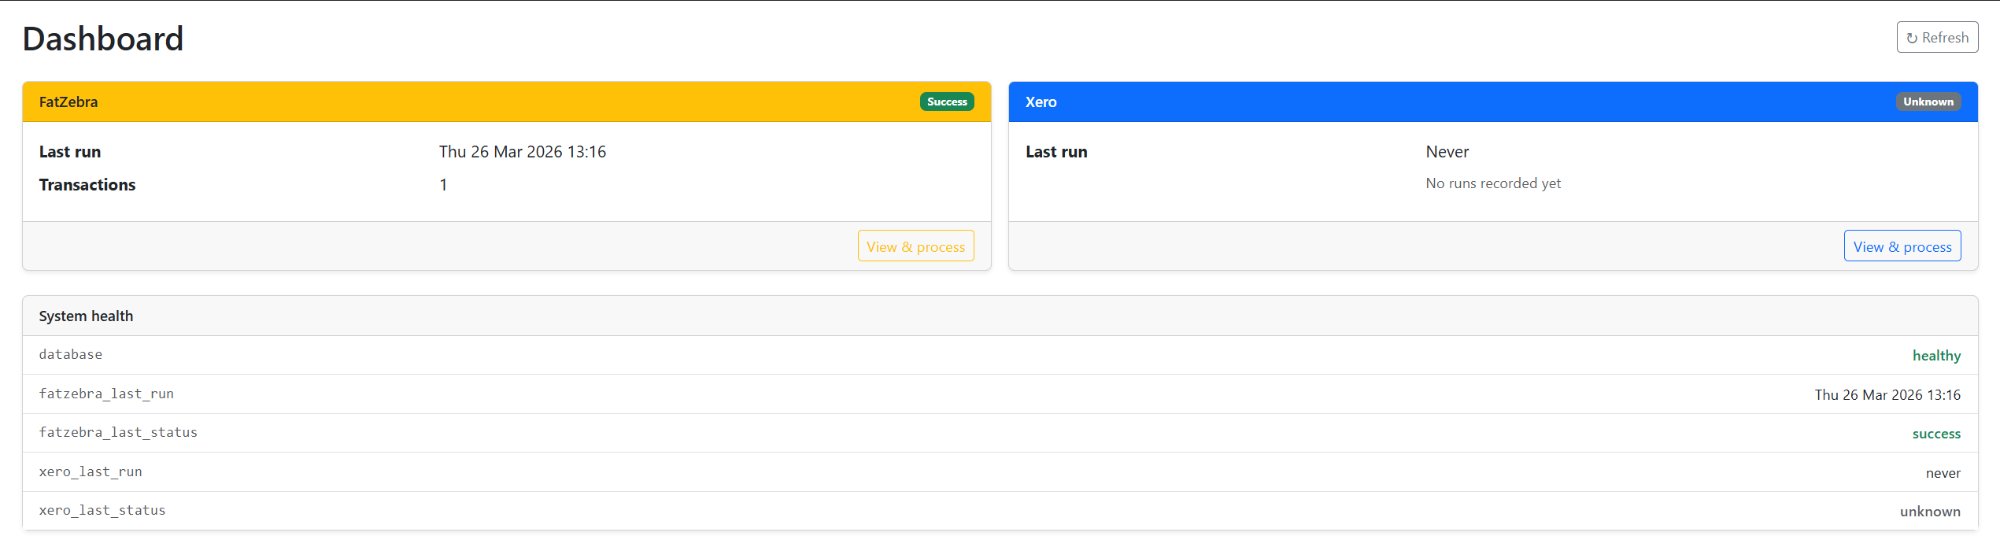
The Dashboard provides an at-a-glance view of the system status — last run time and result for both FatZebra and Xero, plus database health.
- Last run — date and time of the most recent processing run for each service.
- Transactions — number of transactions submitted in the last run.
- Status badge — green Success or grey Unknown if no run has occurred yet.
- System health — confirms the SQL Server connection is active.
- View & process — links directly to the FatZebra or Xero transaction page.
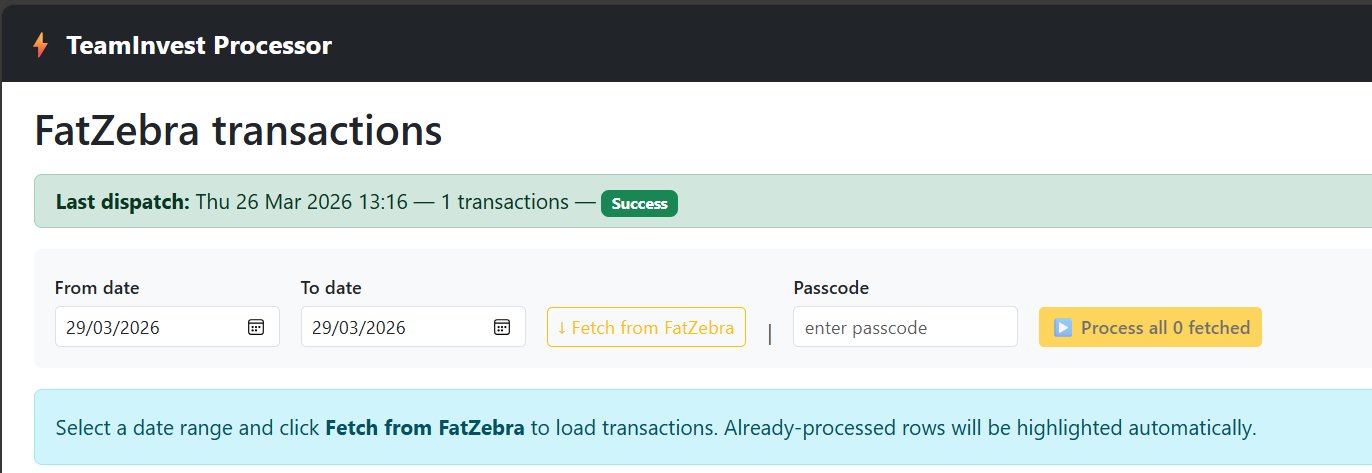
The FatZebra page retrieves credit card payment and refund transactions from the FatZebra gateway for a selected date range.
Step 1 — Select date range and fetch
Set From date and To date then click ↓ Fetch from FatZebra. The last dispatch banner confirms the most recent successful run.
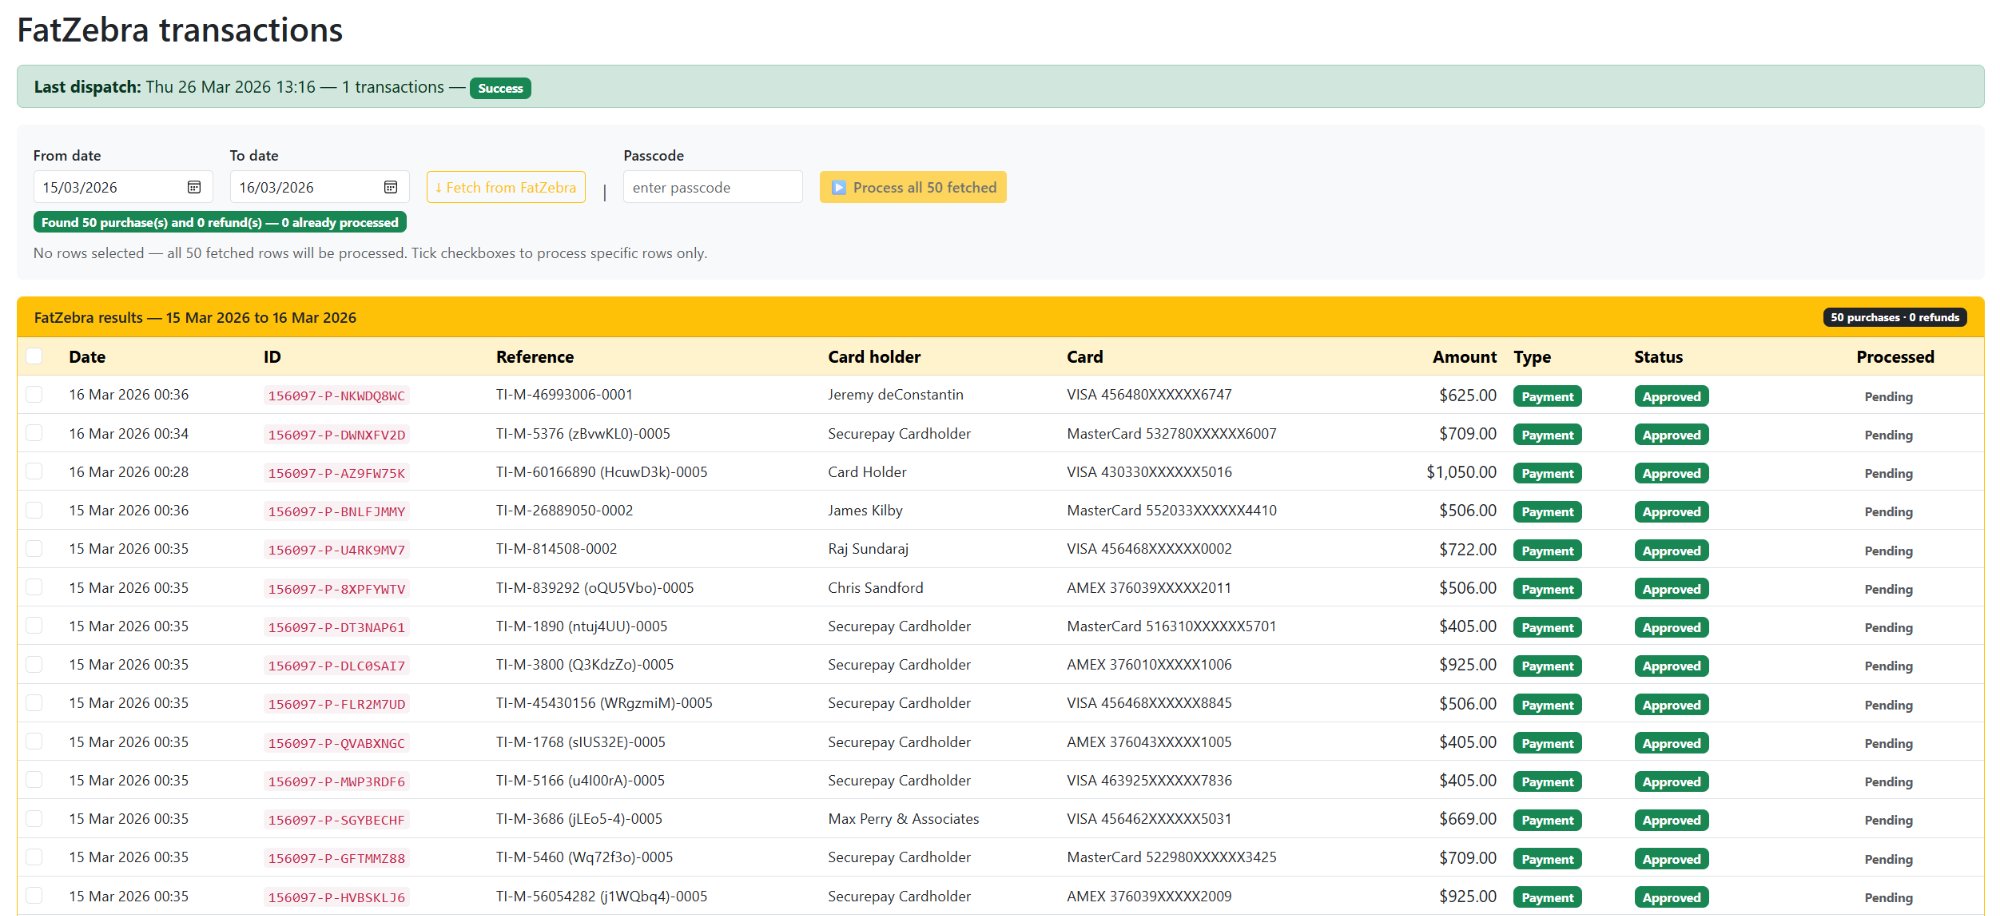
Step 2 — Review the live results grid
All transactions for the selected period are displayed. Rows already submitted to TeamInvest show as ✓ Done.
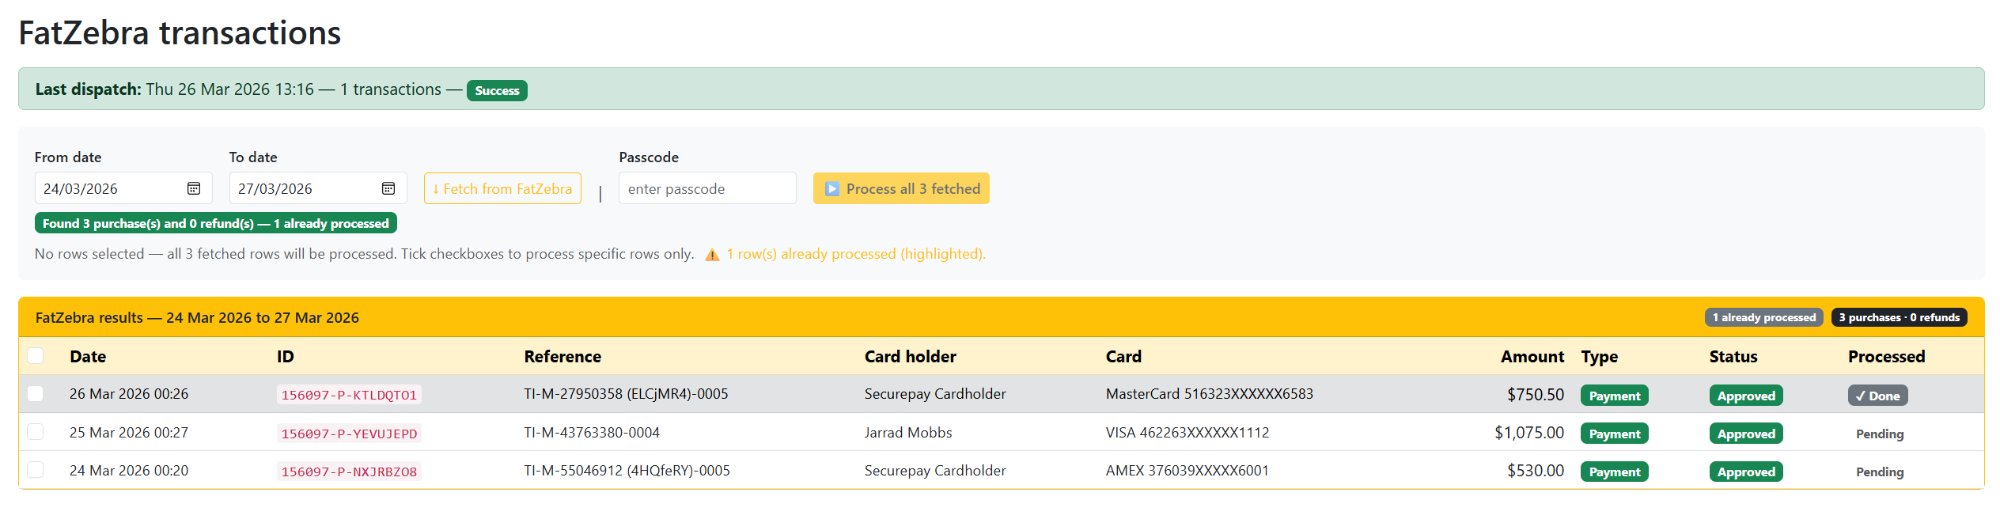
Already-processed rows
When a date range overlaps a previous run, already-processed rows are highlighted in grey with a ✓ Done badge.
Step 3 — Select records and run
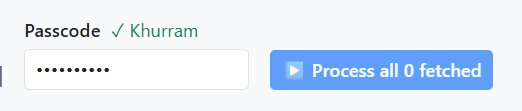
Use checkboxes to select specific rows, or leave all unchecked to process everything fetched. Enter your passcode and click ▶ Process.
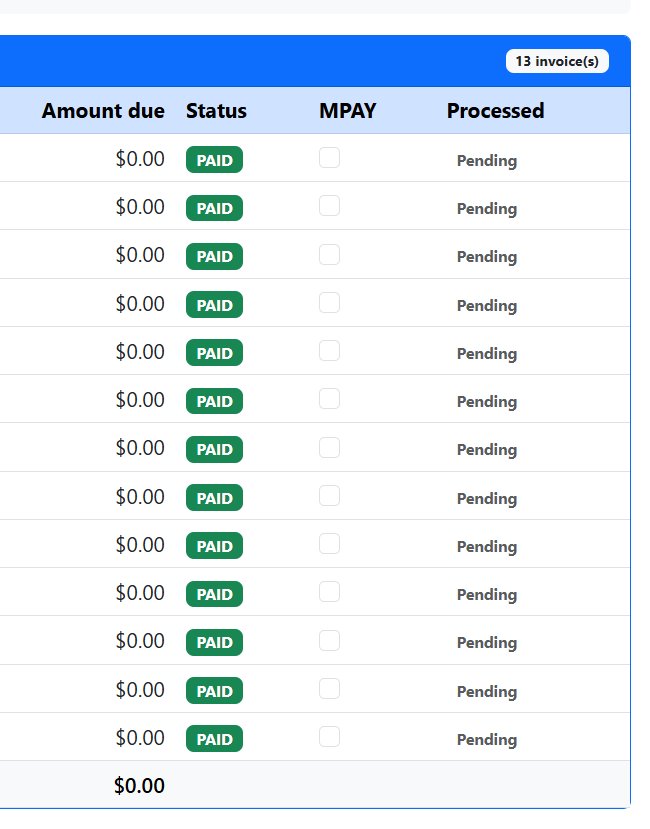
The Xero page retrieves fully paid accounts receivable invoices filtered by FullyPaidOnDate. Only ACCREC invoices with status PAID are returned.
Fetch and review
Set the date range and click ↓ Fetch from Xero. Contact Account Numbers are automatically cross-referenced for CiRef resolution.
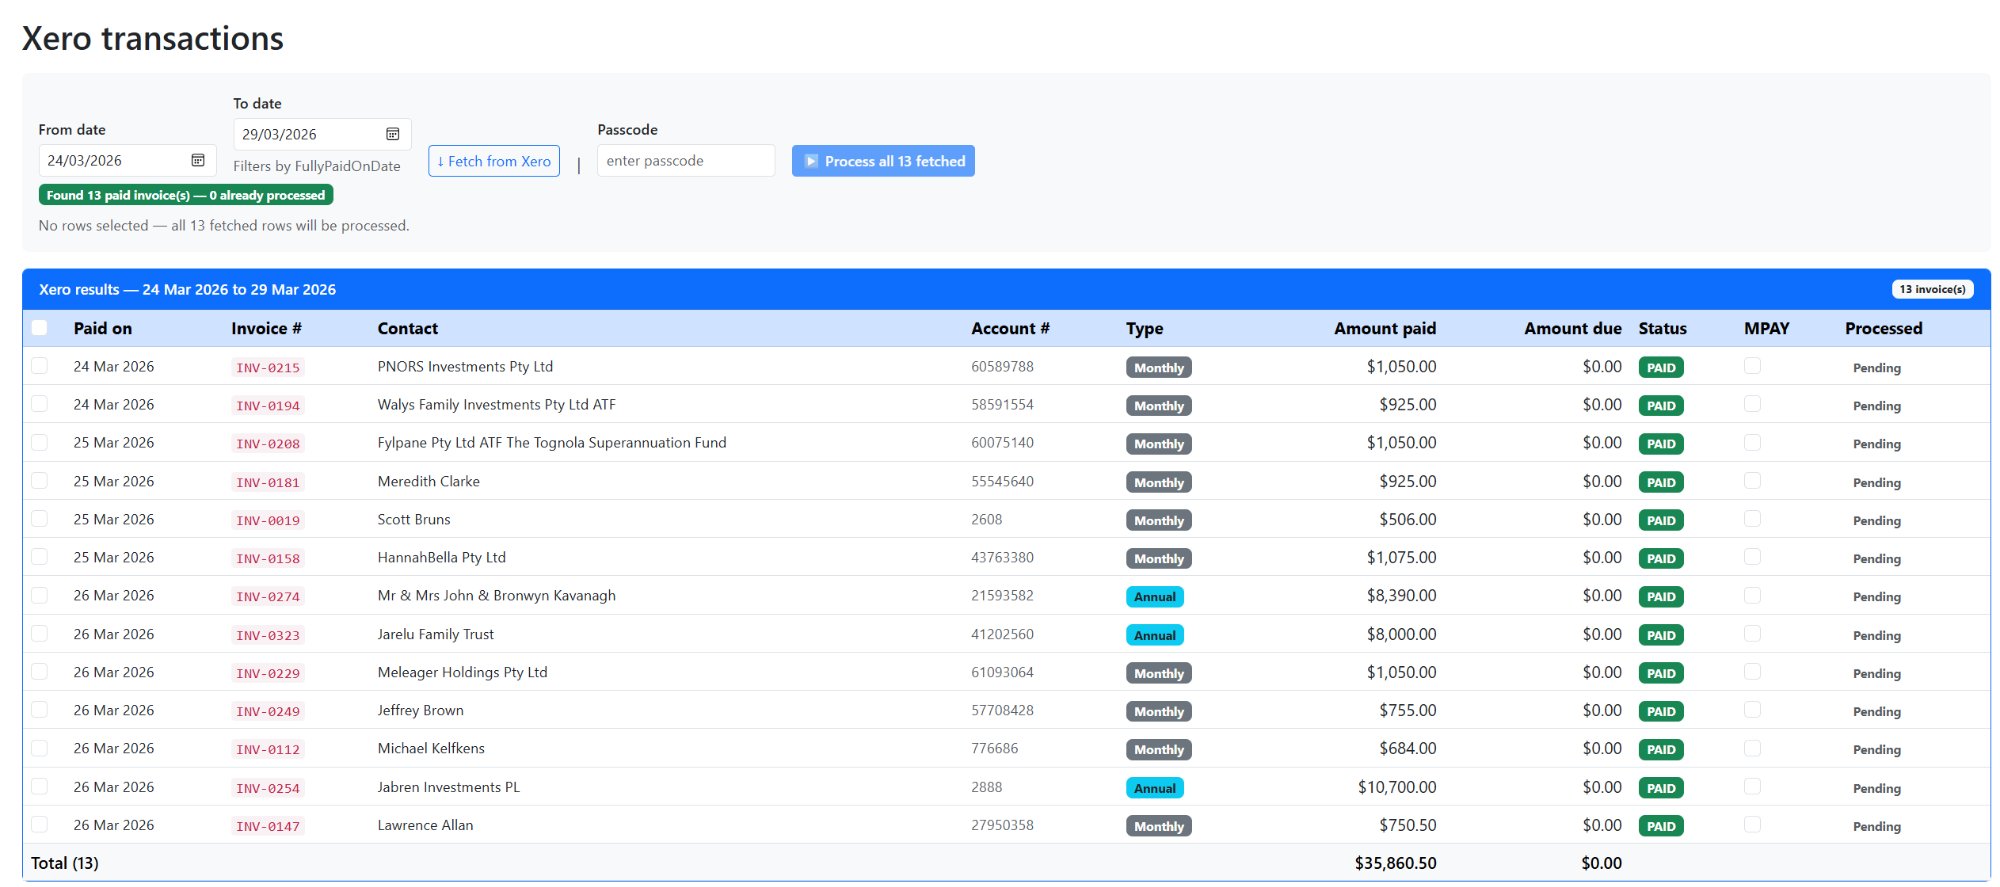
MPAY checkbox
Controls the txnType sent to the API. Unticked = 21 Auto DDR. Ticked = 20 Manual MPAY.
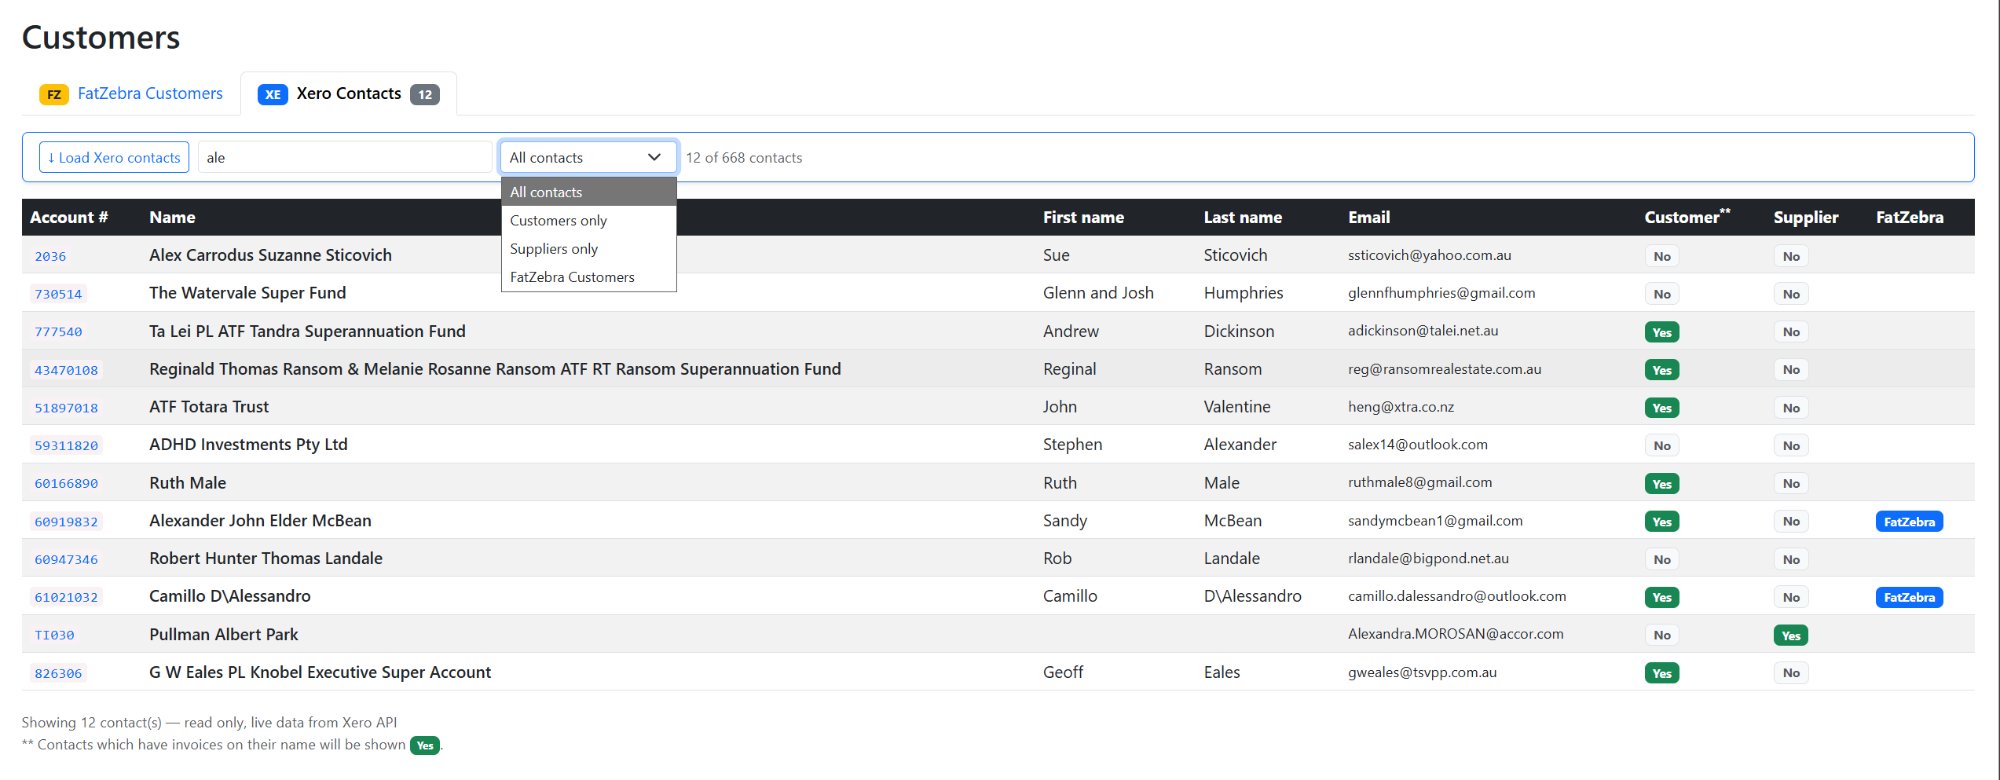
The Customers page provides a read-only view of customer and contact data from both FatZebra and Xero. It is split into two tabs — use it to look up customer details, verify account numbers, or check card information.
FatZebra Customers tab
Click ↓ Load FatZebra customers to fetch the full customer list from the FatZebra gateway. The tab badge shows the total count. Use the search box to filter by reference, name, email or card number in real time.
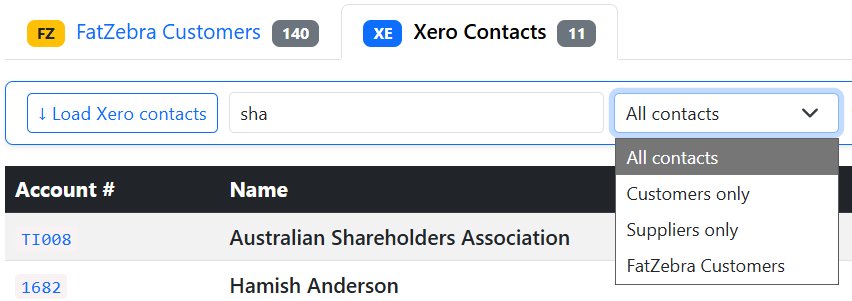
Xero Contacts tab
Click ↓ Load Xero contacts to fetch all contacts from Xero. Use the search box to filter by name, email or account number in real time. Use the contact type dropdown to narrow results:
- All contacts — every contact in the Xero system
- Customers only — contacts that are not suppliers; a Yes in the Customer column indicates the contact has sales invoices on their account
- Suppliers only — contacts marked as suppliers in Xero
- FatZebra Customers — contacts that also have an active FatZebra customer record, shown with a FatZebra badge in the FatZebra column
Column meanings
- Account # — the CiRef used when submitting transactions to the TeamInvest API. Must be set on the Xero contact for processing to work.
- Customer — Yes means the contact has sales invoices in Xero.
- Supplier — Yes means the contact is marked as a supplier in Xero.
- FatZebra — FatZebra badge appears when the contact also has a matching FatZebra customer record.
Each user is assigned a named passcode that authorises a processing run and identifies who performed it in the logs.
- Type your passcode into the Passcode field.
- When you leave the field, validation runs automatically.
- If valid, your name appears in green and the Run button becomes active.
- If invalid, the field turns red.
- After a successful run the passcode field is cleared automatically.
appsettings.json under Processing.Passcodes.
Contact your administrator to add or update passcodes.
- Select the date range.
- Click Fetch — review results, note any already-processed rows.
- Optionally tick specific rows to process a subset only.
- For Xero — optionally tick MPAY on manual payment invoices.
- Enter your passcode and wait for the green name confirmation.
- Click ▶ Process.
- Results are saved — processed rows update to ✓ Done.
- Passcode is cleared automatically.
Result badge meanings
- Done by Alice — 5 processed, 0 skipped — all transactions submitted successfully.
- Done by Alice — 3 processed, 2 skipped — some transactions were duplicates already in TeamInvest.
- Completed with 1 error(s) — one or more failed, rest were still processed.
Shows a full history of every processing run — service, time, transaction count, status and any errors.

Shows every individual transaction that has been processed. Filter by FatZebra or Xero using the tab buttons.
Duplicate protection operates at two levels — the local database highlights already-processed rows in the live grid, and the TeamInvest API reports duplicates in skippedTxnIds.

Passcode field turns red
Check with your administrator that your passcode is correct in appsettings.json under Processing.Passcodes.
Fetch returns no transactions
Check the date range — FatZebra uses transaction date, Xero uses FullyPaidOnDate.
Rows still showing as Pending after processing
Click Fetch again — the page re-fetches and cross-references the database, updating rows to ✓ Done.
Process button is disabled
Both conditions must be met — fetched results in the grid and a valid passcode showing the green owner name.
TeamInvest API error during processing
- txnRef not found — the Account Number doesn't match a member in TIMMS. Check the Xero contact's Account Number.
- paymentReference too long — transaction reference exceeds 50 characters.
- API unreachable — check network connectivity to
online.consciousinvestor.com.
Xero invoices missing Account Number (CiRef blank)
The contact in Xero does not have an Account Number set. Update the contact in Xero and re-fetch. Use the Customers → Xero Contacts page to verify Account Numbers.
Database shows unhealthy on Dashboard
Check that SQL Server is running and the connection string in appsettings.json is correct.